Disassembly of the Para Ordnance P-14 .45 ACP
|
Note that this is just the standard disassembly I do for everyday
cleaning. Full disassembly and cleaning is recommended at least once a
month for firearms that are utilized often (as mine are).
Before starting this, read the Preparation page!
|
|
|
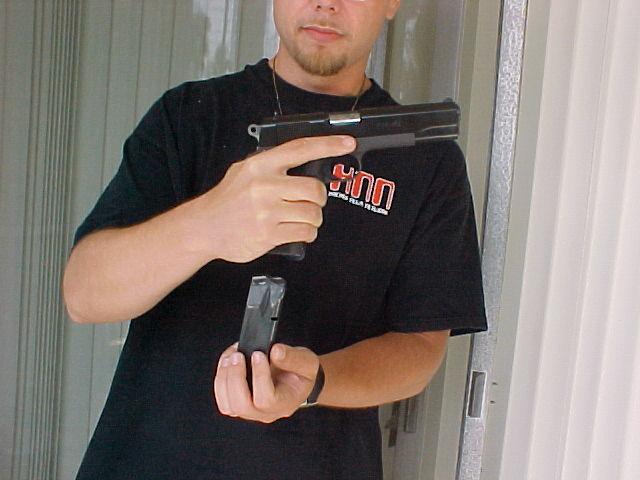
First of all, render the gun SAFE! I cannot overstress this
simple step. Far too many otherwise clued-in gun owners court self-injury
when they do not properly disarm a semi-automatic weapon.
The first step is to eject the magazine. Always eject the magazine first. Failure to do so (e.g., working the action and then removing the magazine) only creates a potentially hazardous situation in which a round may be inadvertently chambered, thus leaving the user with the impression that an armed weapon is not armed.
|
|
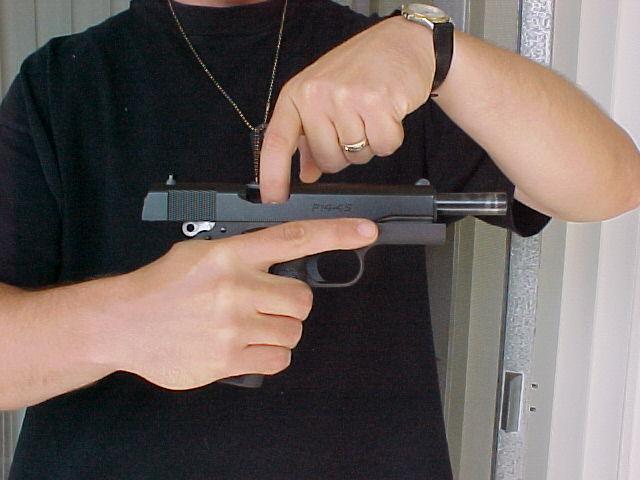
The second step is to work the action and lock it open. Visually and
manually inspect the breech and chamber to confirm that the firearm
does not contain ammunition.
Once you have removed all ammunition from the firearm and confirmed that there is no ammunition in the firearm, remove all ammunition from the cleaning area.
|
|
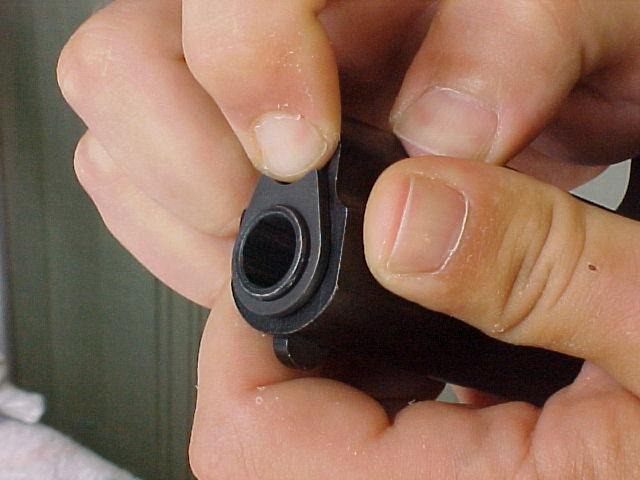
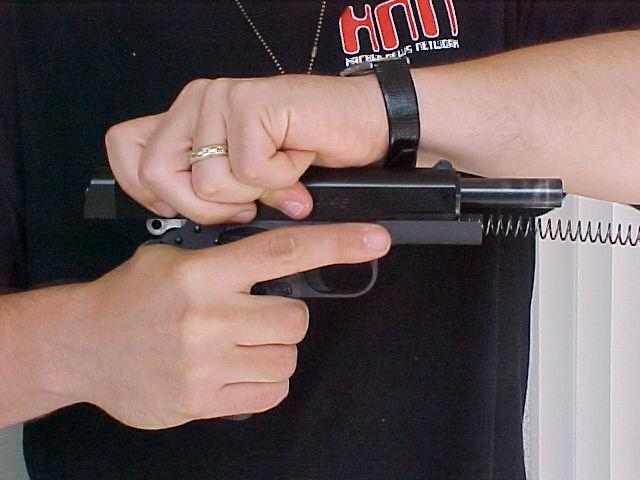
Press in the recoil spring plug. While your finger is in place and the spring plug is depressed... |

|
...rotate the bushing 45 degrees to the left. This will allow you to extract the spring plug. Be sure to keep your finger on the plug. If you take your finger off the plug after the bushing has been rotated, the spring will launch the plug across the room and you'll have a darn good time trying to find it. |

|
Take the recoil spring plug off and set it aside. |

|
Pull back the slide until the lug on the left side of the slide stop is aligned with the slide clearance notch. |
|
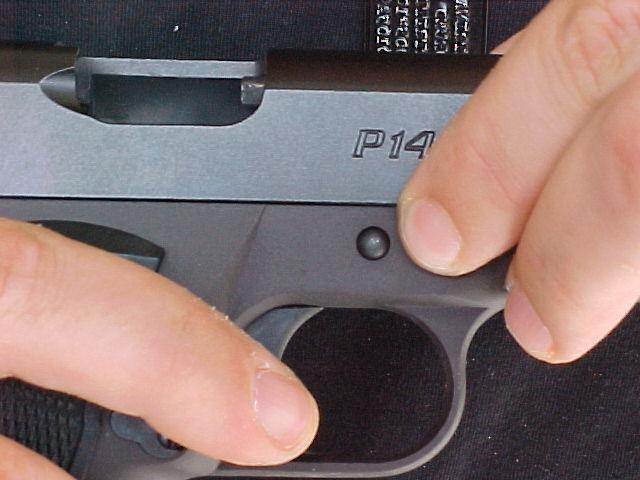
On the right side of the firearm, push in the rounded end of the slide stop pin. |

|
As this photo demonstrates, pushing in the rounded end helps make it easier to get ahold of the slide stop. |

|
Pull out the slide stop and set it aside. |
|
Take a firm grasp of both the handle and the slide... |

|
...and pull the slide forward until it disengages from the body of the firearm. |

|
Like so.
(I generally hold the slide upside down once I've removed it from the body of the gun. This prevents the spring from possibly sliding out and falling to the floor.) Set the gun handle assembly aside. |
|
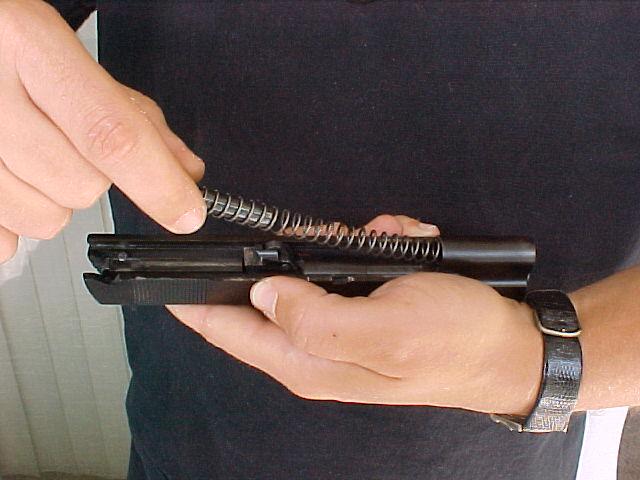
Lift the spring assembly and pull it toward the rear of the slide. Set the spring assembly aside. |
|
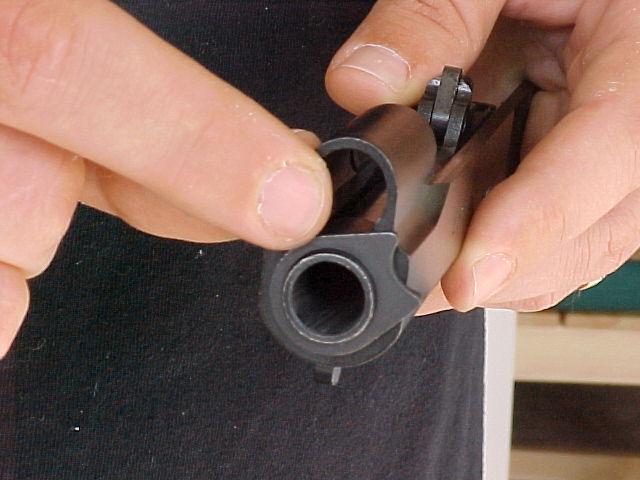
Note the position of the bushing... |
|
...and turn it 90 degrees in the opposite direction. This will allow you to remove the bushing from the muzzle of the gun. |
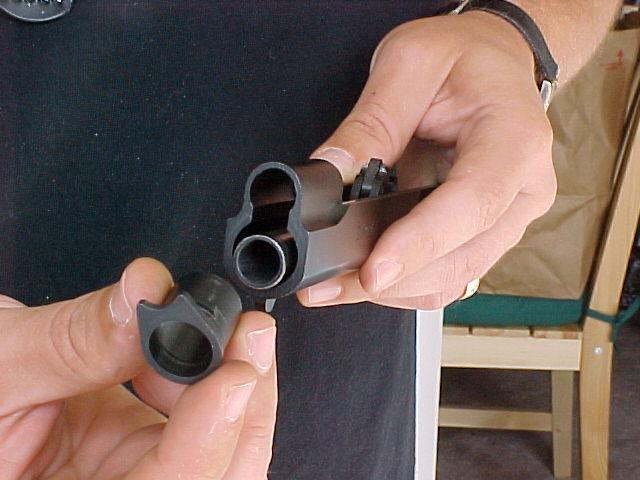
|
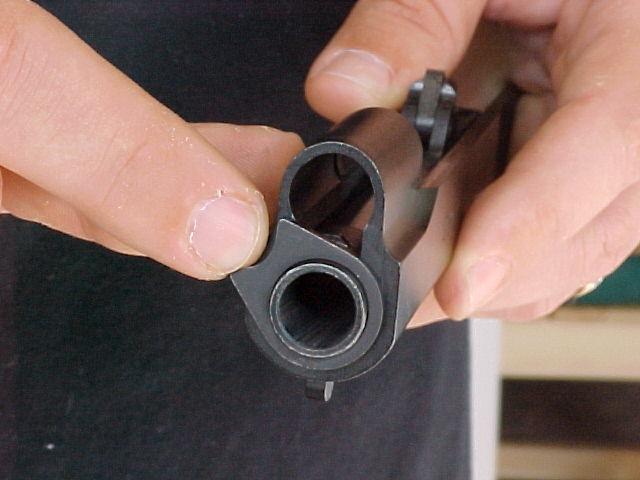
Like so.
Set the bushing aside. |

|
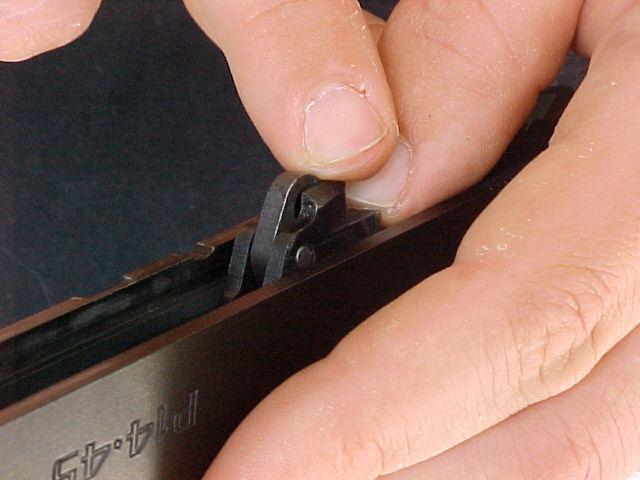
Note the position of the link on the barrel within the slide. |
|
(Close up of the above.) |

|
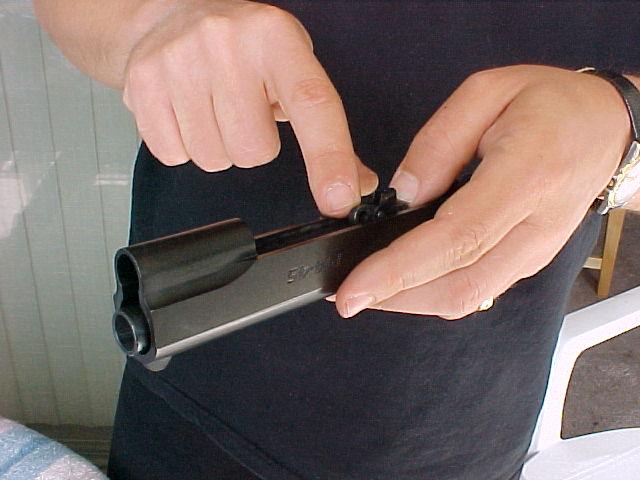
Push the link forward. |
|
(As seen here.) |
|
...and remove the barrel out of the front of the slide. |
|
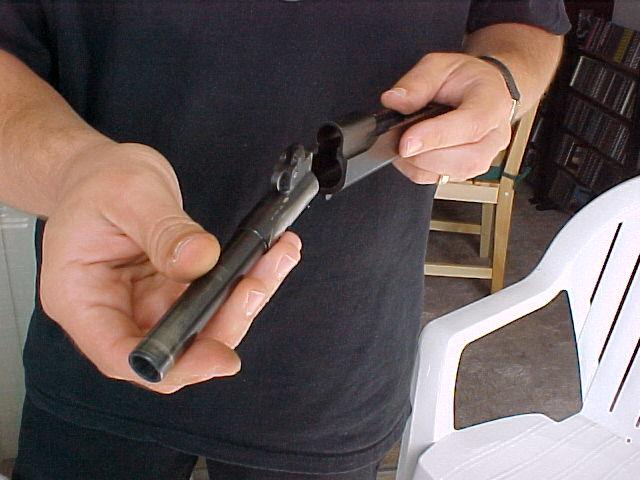
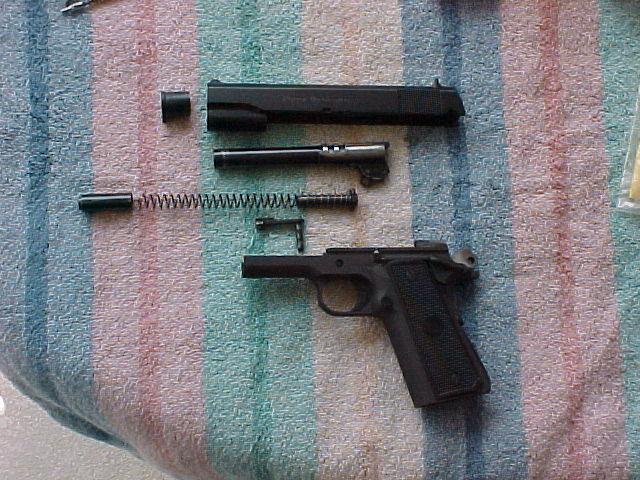
This is how the .45 ACP looks at this stage of disassembly.
At the very top of the picture is the bushing and the slide. Next is the barrel. Below that are the spring plug and spring assembly. Beneath those is the slide stop. At the very bottom is the firearm body which contains the trigger and hammer mechanisms. (I'll eventually get to a tutorial on disassembling those portions of the firearm, but this should be enough for the interim.)
|
|
We are now ready to proceed with cleaning the
firearm.
|
|